Contents of the article
Changing the name of a module
Each module of the EasyKitchen library has its own name. The principle of the basic naming of modules is described in the article Names, symbols and designations. If you want to change the name of the module, then it is not enough to change it only in its parameters. Changes need to be made in three different places.
Changing the name in module parameters
The first step is to change the name of the module in its parameters. To do this, open the parameters window and find the "Module" parameter:
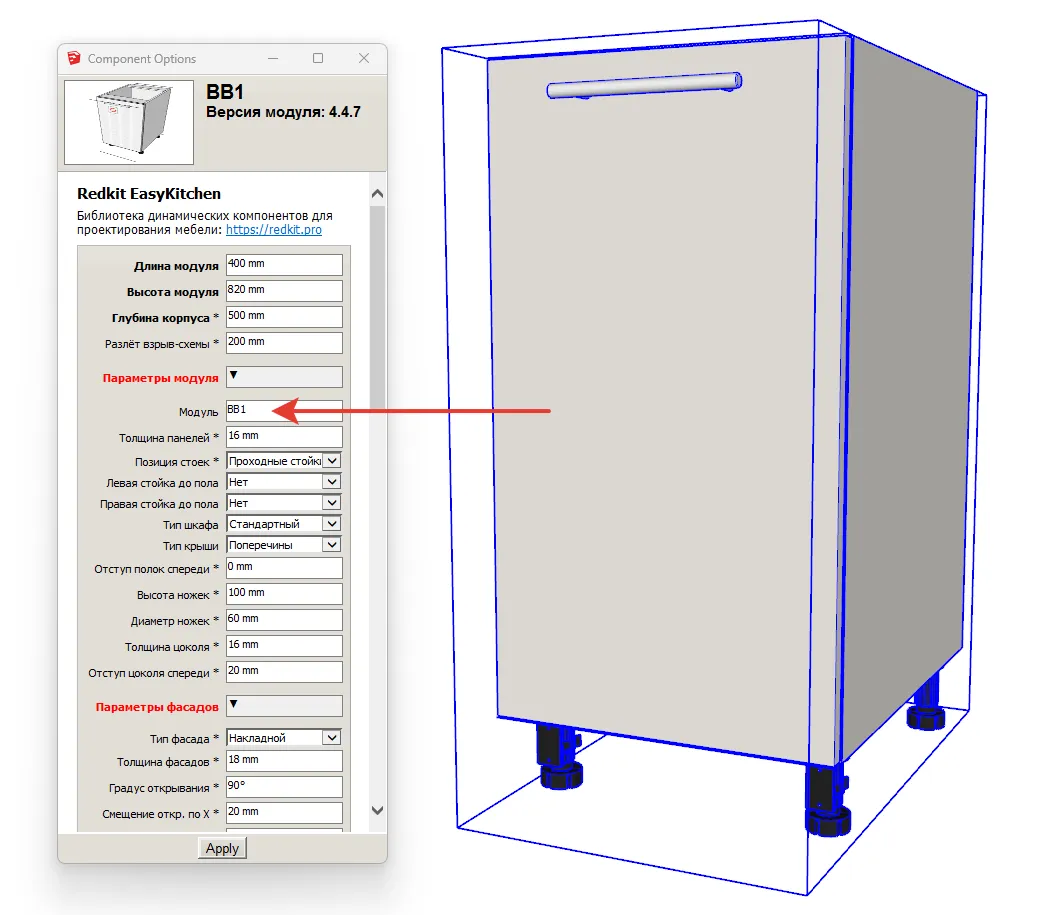
Change the name to your own and click the "Apply" button. This name will be used later in the report.
Do not use the forward slash character "/" in the module name. This will lead to errors in the report.
Changing the name in Entity Info
The next step is to change the name in the object definition, in the "Entity Info" tab:
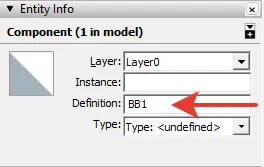
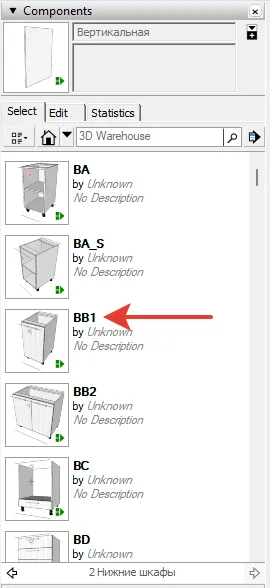
It is this name that is the name of the module in the component window of the EasyKitchen library:
Changing the Graphic Name
The graphic name is a texture, not text. Therefore, here you need to prepare an image with a new name in advance:
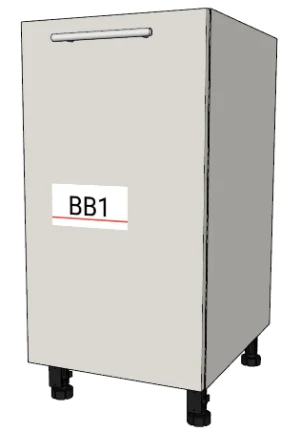
For the best quality, we recommend creating a 320x160px PNG image and saving it somewhere on your PC.
Next, select the "Paint Bucket" tool, then hold down Alt to change the fill to the "Sample Material" tool and click on the graphic name. The Materials tab on the right side of the SketchUp screen will display the selected graphic name texture. In the same place, go to the "Edit" tab and double-click on the "Use Image" checkbox:
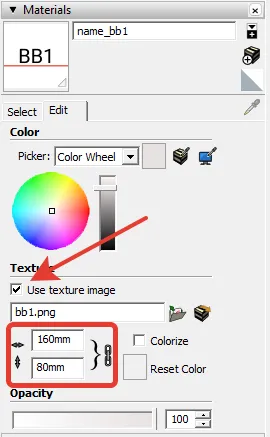
A window will open where you can select your pre-prepared graphic name file. The last step is to check the resolution of the texture. Although we originally recommended 320x160px, SketchUp needs 160x80px. Believe me, the image will be much clearer.
In order for the name to remain behind the module, it must be saved back to the library in a special way. This is described in detail in the article Customizing the library for yourself.


